
Introduction
I recently discovered an interesting tool called Entra Id Auth SDK (sidecar) following my new “hobby” around AI topics. In addition, the same week, I also discovered from Merill Fernando’s tweet that this is an internal MSFT tool that developers are using to protect their applications.
Long story short, this tool helps you to:
- Validate a token
- Generate a token as both client credential & On Behalf Flow (OBO)
- Call a downstream api in one call
For people like me who discuss with developers on a regular basis, this can be a gold mine. I can’t count the number of times a developer thought that if you have a JWT, you’re good to go…
So I simply decided to spend a few hours playing with it, and provide my feedback.
In this article, we will start smoothly and imagine you are a developer building a web API. For now we will keep AI and web API topics aside. Because this is a sidecar, we will simply use Docker and run straight REST calls and only validate tokens.
What is a sidecar?
If the term is new to you, a sidecar is a small, separate container that runs right next to your main application container and handles a cross-cutting concern on its behalf (logging, networking, security, etc.). Both containers share the same lifecycle and talk to each other locally, usually over localhost.
The nice part is that your application doesn’t need to know how the work is done; it just makes a local call and gets a result back. Here, instead of embedding token validation and acquisition logic (and the matching libraries) inside your app, you delegate it to the sidecar. The same pattern works unchanged whether you run on Docker, Kubernetes, ACA/ACI, ECS, and so on.
App registration
Let’s start quickly with the app registration configuration. I know this is not best practice, but to simplify I will create one application that will act as both client and resource (backend api).
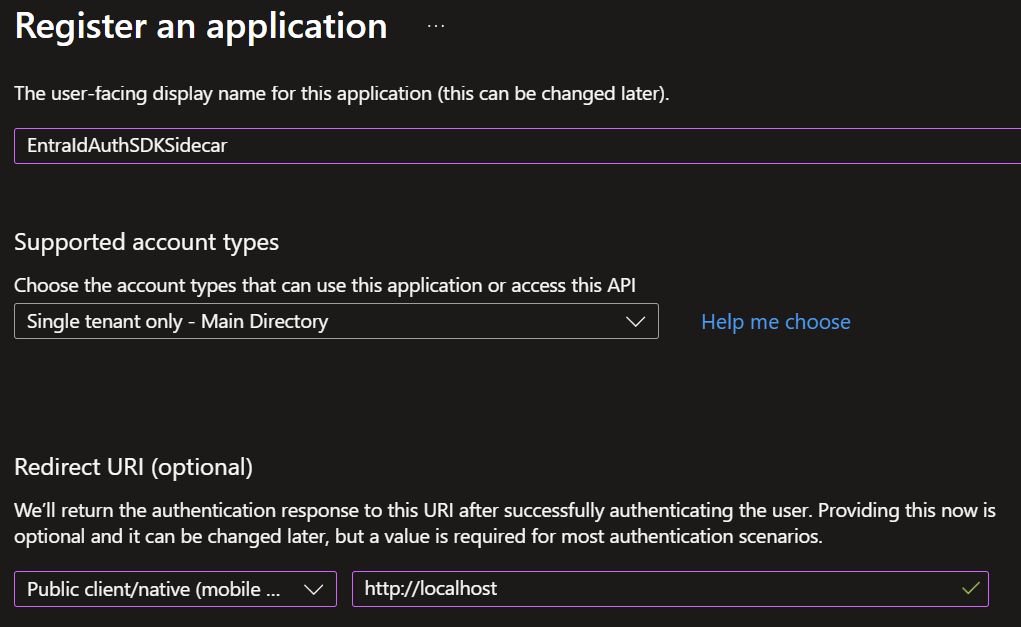
Let’s create the app and configure it as desktop app with http://localhost. As usual with me, my client will be my Pwsh shell.
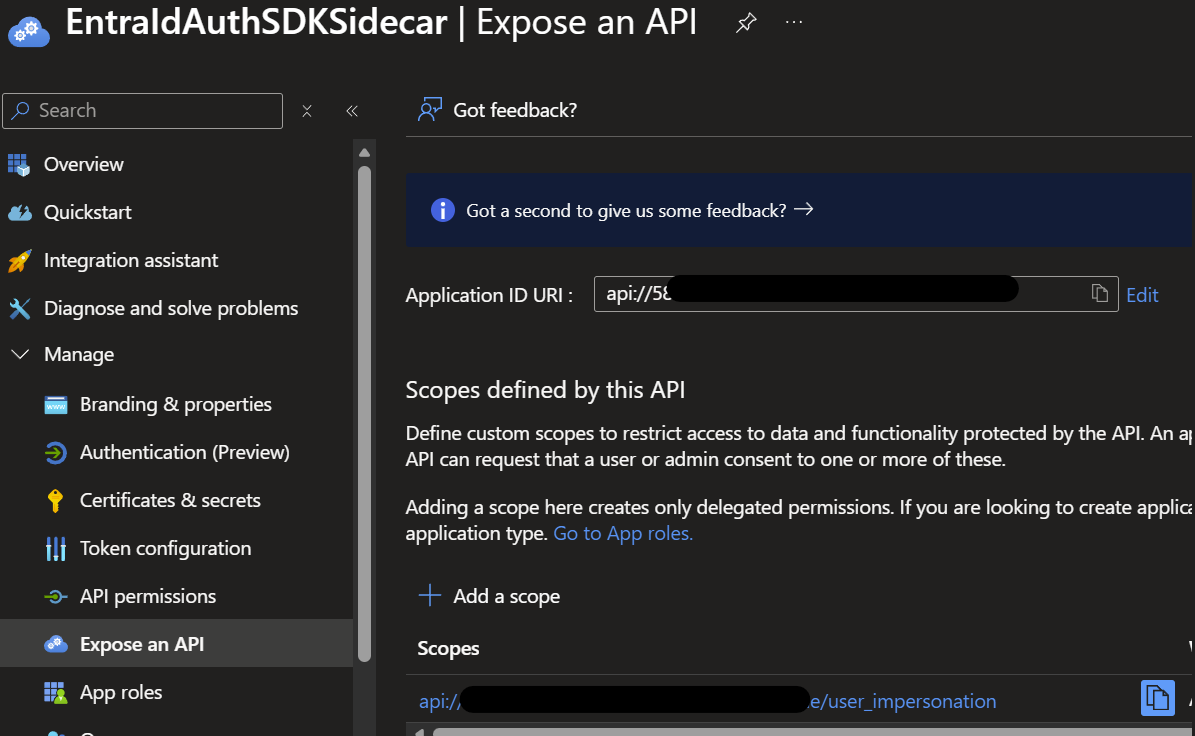
Once registered, configure your application as a backend API and add the user_impersonation scope to allow the user flow.
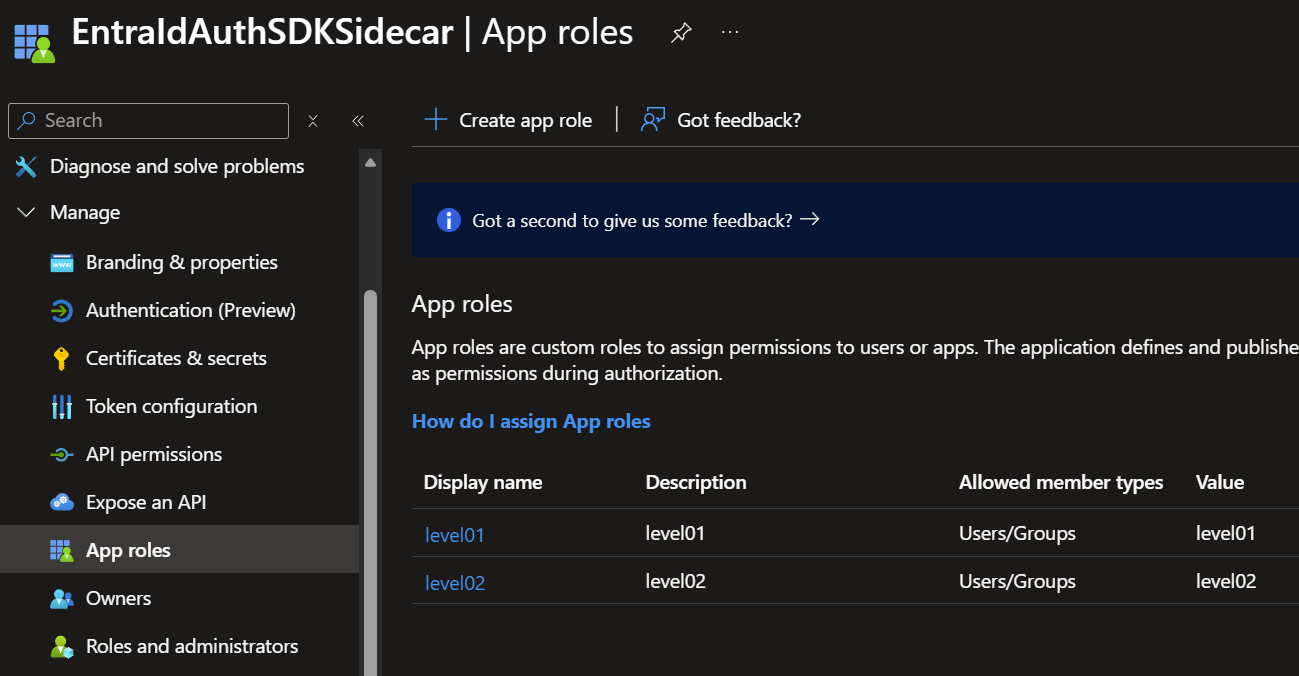
For the fun I will have some roles
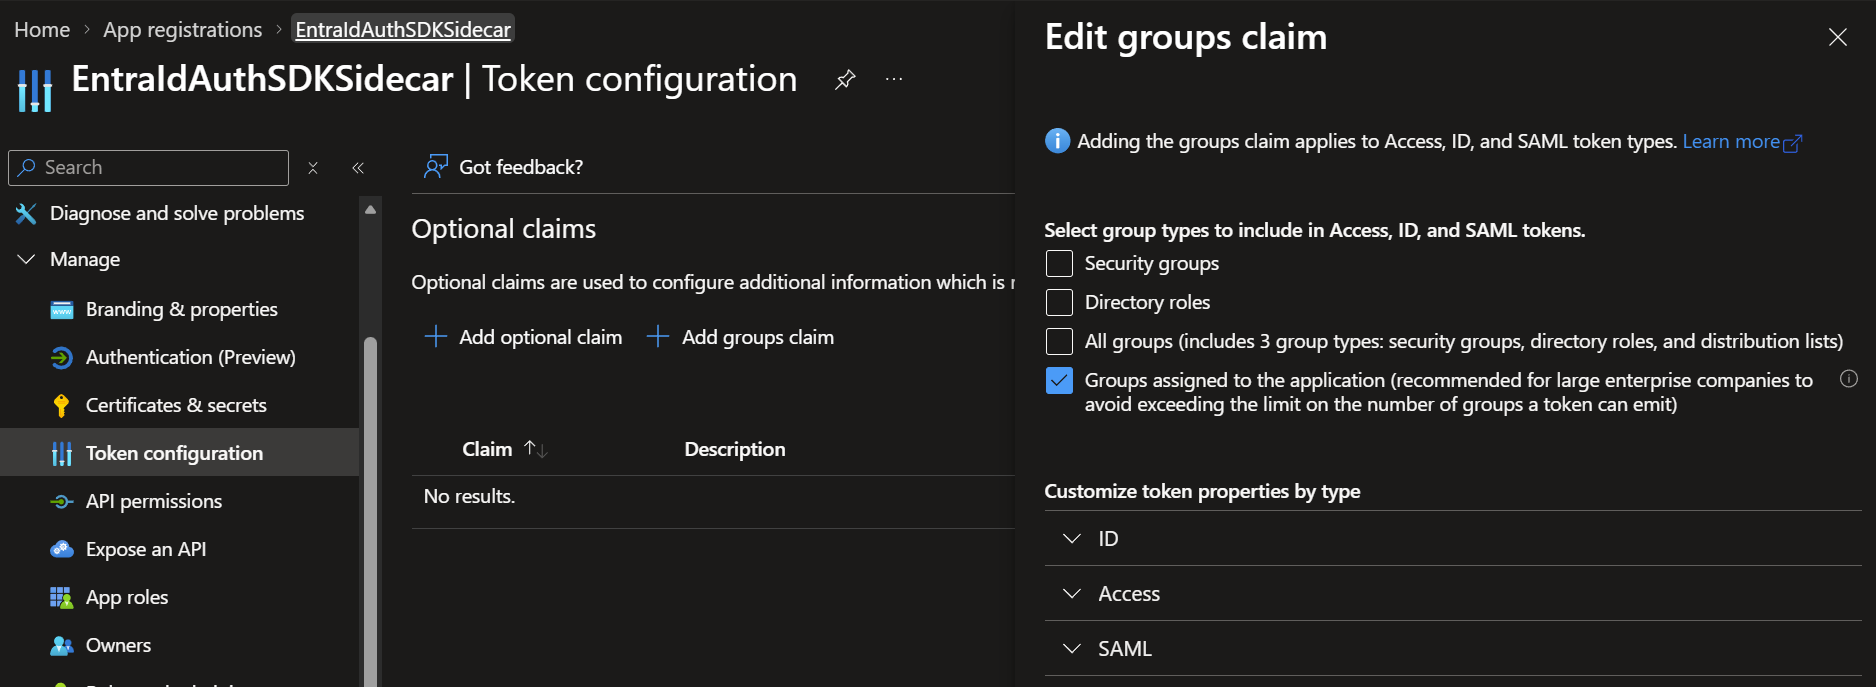
And configure groups
And now let’s grant some user permissions within the service principal
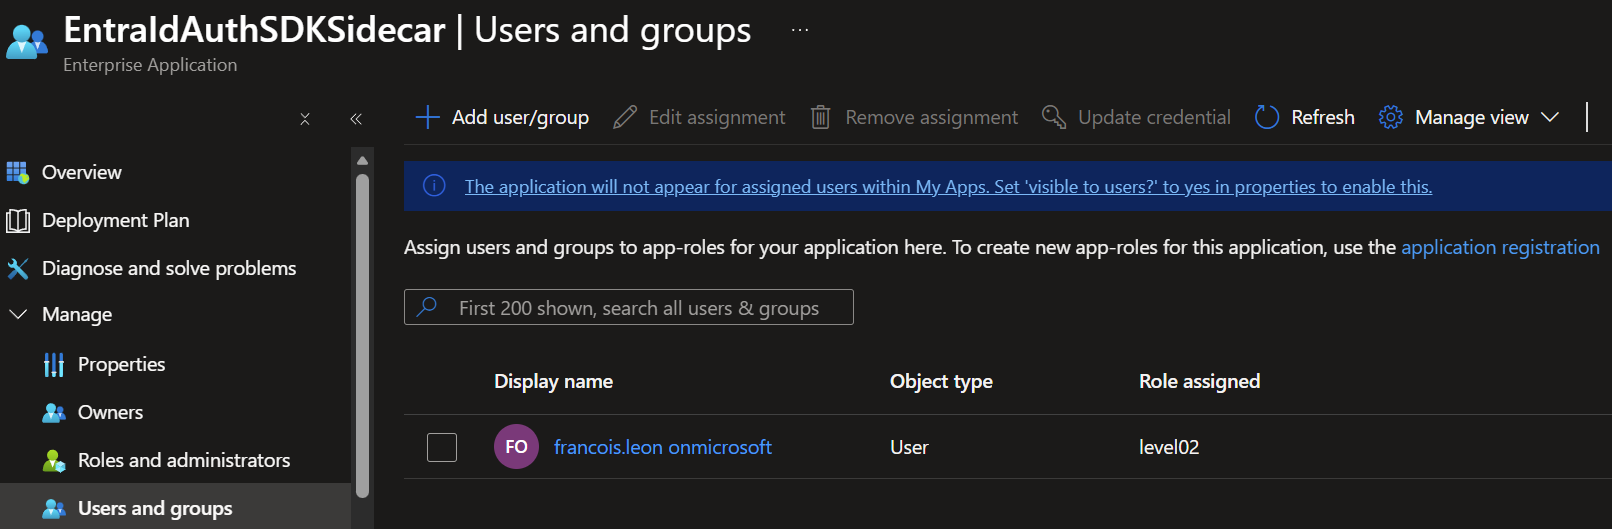
We should be good to go now, let’s configure Docker
Docker configuration
First the registry: the doc is not up to date, but the registry is located here and the latest build that I’m interested in is 1.1.2-azurelinux3.0-distroless.
Now that we have our image, let’s run it in WSL (a simple Ubuntu with the Docker engine installed)
docker run --rm -it -p 8080:8080 \
     -e ASPNETCORE_ENVIRONMENT=Development \
     -e AzureAd__EnablePiiLogging=true \
     -e Logging__LogLevel__Default=Debug \
     mcr.microsoft.com/entra-sdk/auth-sidecar:1.1.2-azurelinux3.0-distroless
And you should see something like this:
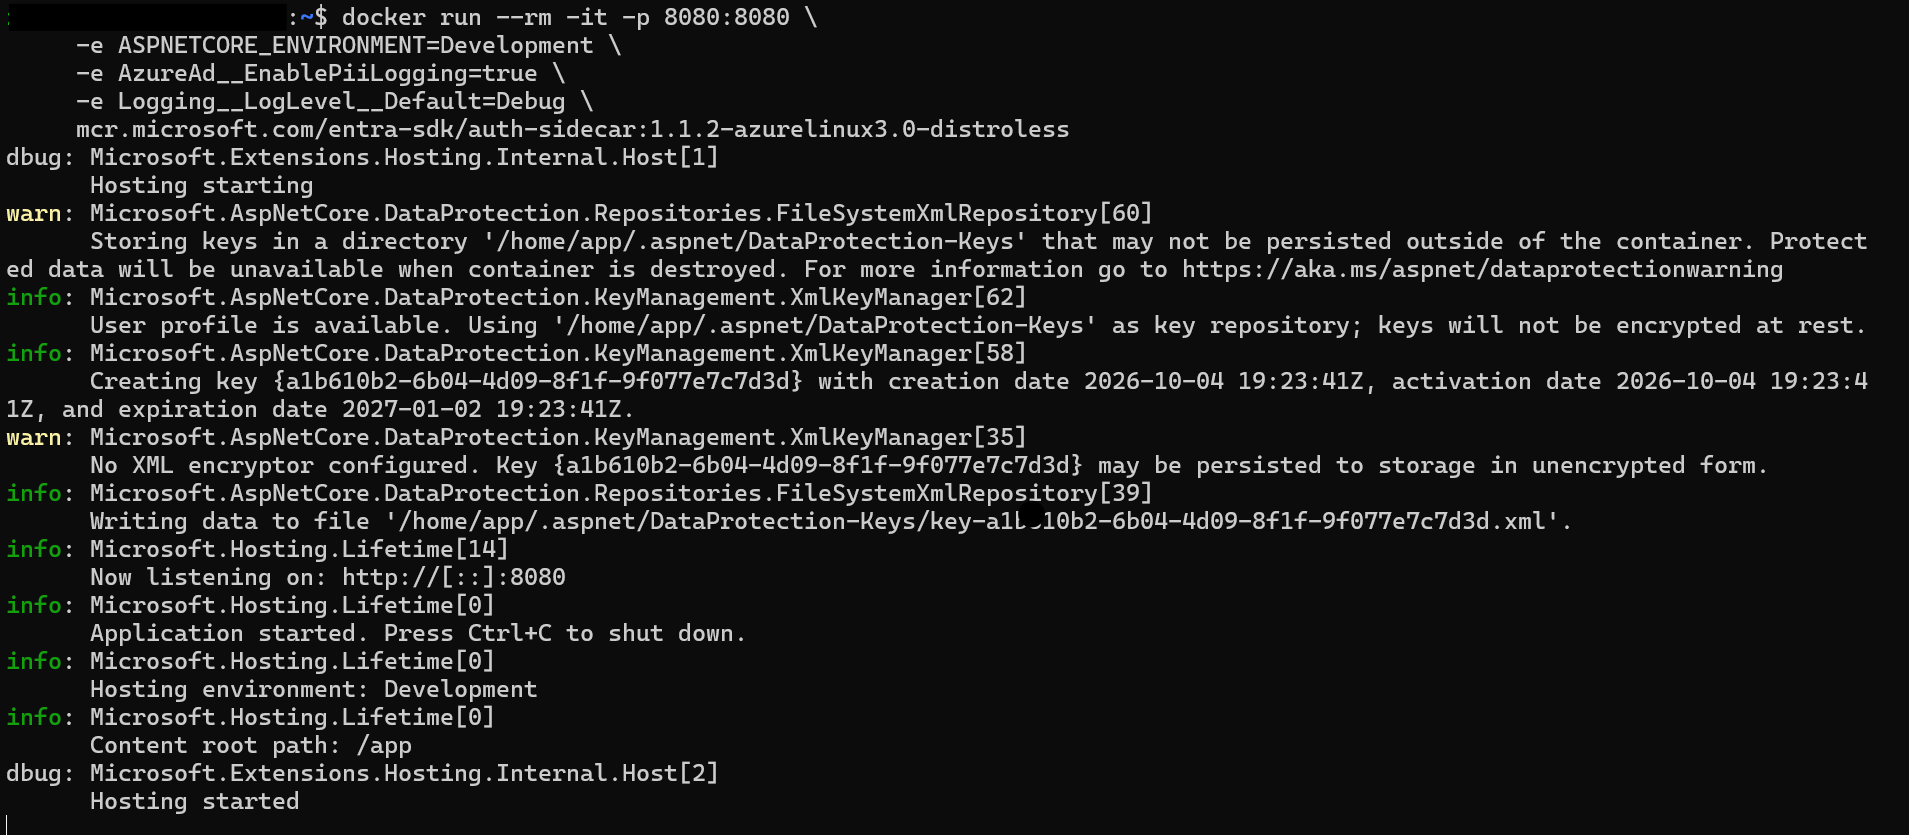
Open another Pwsh shell and try
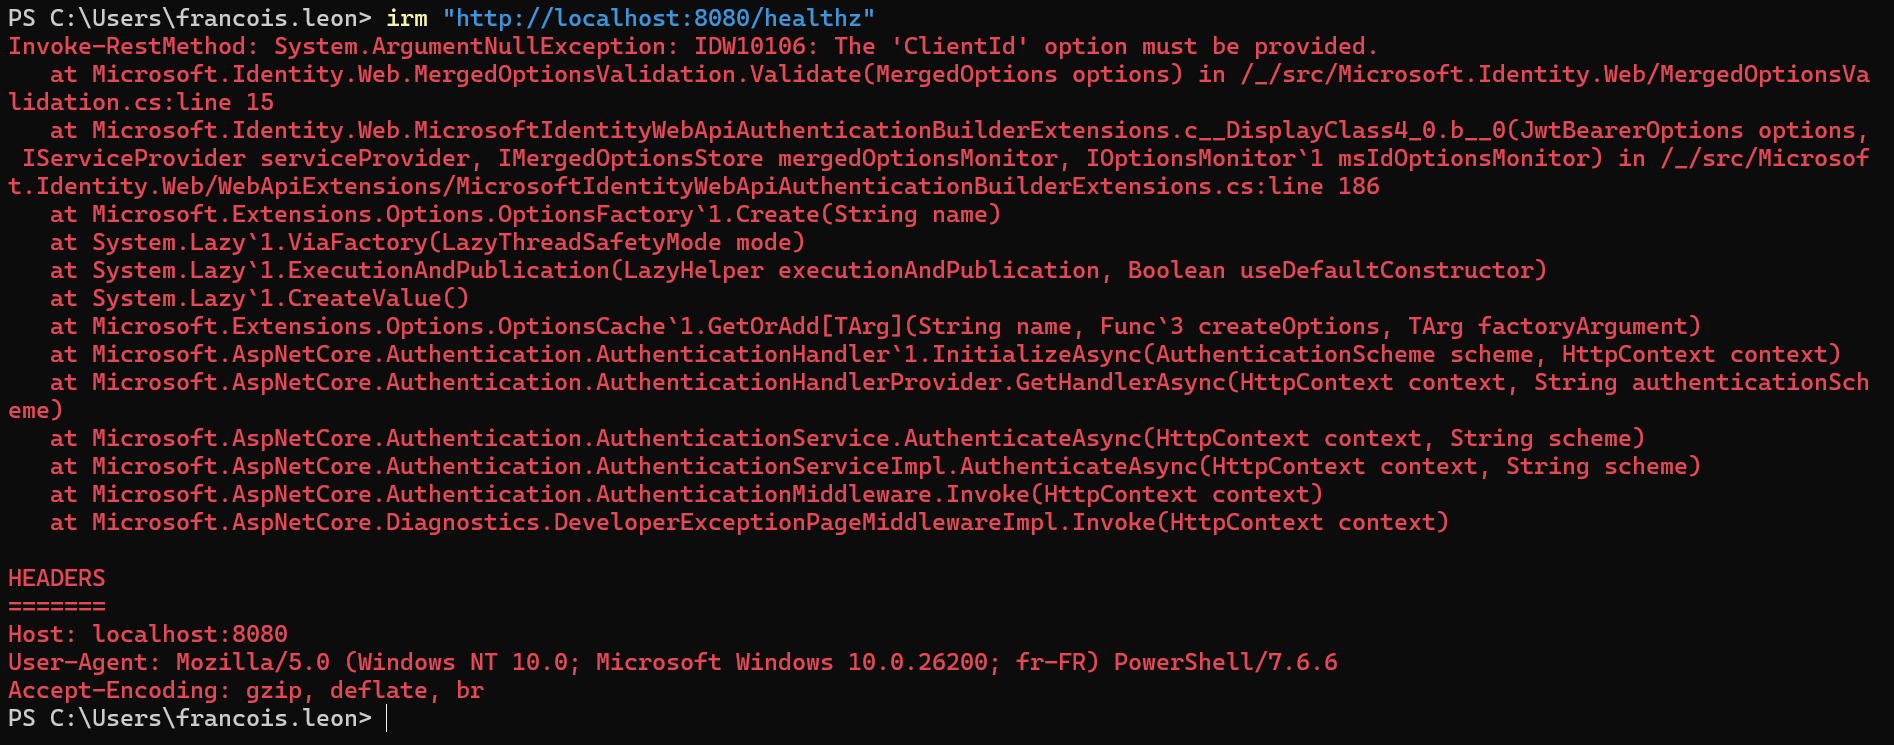
irm "http://localhost:8080/healthz"
You should see from the client side:
And from the server side:
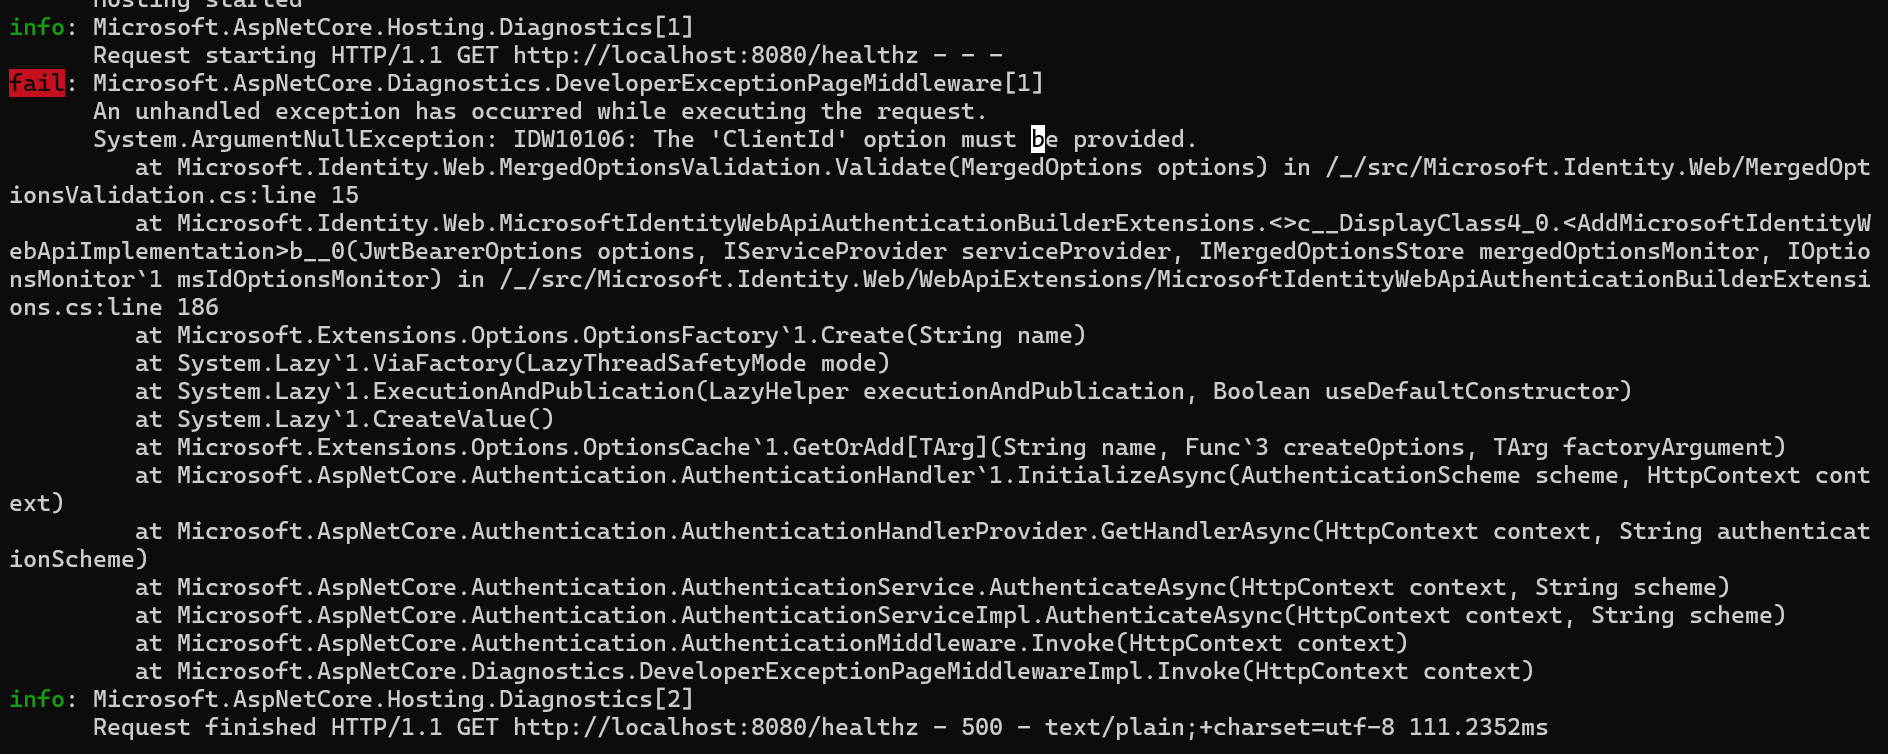
And this is my first comment: don’t be scared by big errors like this, you will face a lot of them during your experimentation. I don’t know if I’ve missed something, but most of the time the error messages are NOT user friendly (except this one, of course).
So let’s stop the container and start it again with more parameters:
export TENANTID="<your tenant Id>"
export CLIENTID="<your client Id>"
export AUDIENCE="api://$CLIENTID"

docker run --rm -it -p 8080:8080 \
     -e AzureAd__ClientId=$CLIENTID \
     -e AzureAd__TenantId=$TENANTID \
     -e AzureAd__Audience=$AUDIENCE \
     -e ASPNETCORE_ENVIRONMENT=Development \
     -e AzureAd__EnablePiiLogging=true \
     -e Logging__LogLevel__Default=Debug \
     mcr.microsoft.com/entra-sdk/auth-sidecar:1.1.2-azurelinux3.0-distroless
Let’s explain few things:
- Regarding the tenant Id, it’s your call, but you have to specify it if you’re building a single-tenant application, which is, I guess, the default for most of us. As usual, you can check the MSFT docs if you plan to create multi-tenant applications.
- The client Id is kind of useless at this stage, but soon it will be mandatory. Long story short, this is the AppId that will be used to execute some web calls. Because the client and backend API are using the same application, the audience will be close to the same id (by default). If you decide to slice it and separate the two, for example if you have a single client for multiple backends, then the two values will be different.
- For the audience, the main thing you have to know is that if you’re using a V1 application (in the manifest,
accessTokenAcceptedVersionequals null or 1) the value should look likeapi://clientId(default value). And if you’re using a V2, the value will be onlyclientId(without the api://).
So now before doing anything, let’s try our healthz route again
irm "http://localhost:8080/healthz"
And now the result should return:

We’re now ready to go to the next step!
Token validation
Remember that for now we don’t have any secret anywhere. In this part, we will simulate a simple web API that needs to do something based on the result of the token (Is it expired? Is it for me? And a few other checks…).
OAuth2 Flow: Client → Web API (EntraId-protected) with Validation Sidecar
==========================================================================

                                    ┌───────────────────┐
                                    │                   │
                                    │     Entra ID      │
                                    │  (Authorization   │
                                    │     Server)       │
                                    │                   │
                                    └─────────┬─────────┘
                                        ▲     │
                              (1) Request    │ (2) Issue
                              token for      │ access token
                              Web API        │ (audience =
                              (audience)     │  Web API)
                                        │     ▼
                                 ┌──────┴──────────────┐
                                 │                     │
                                 │       Client        │
                                 │                     │
                                 └──────────┬──────────┘
                                            │
                           (3) Call Web API with
                               Bearer <access token>
                                            │
                                            ▼
┌───────────────────────────────────────────────────────────────────────────┐
│  Container                                                                │
│                                                                           │
│   ┌────────────────────────┐          ┌────────────────────────────────┐  │
│   │                        │  (4) POST│                                │  │
│   │                        │  /validate│         Sidecar               │  │
│   │                        │  + token  │  (Entra ID Auth SDK)          │  │
│   │       Web API          ├──────────►│                               │  │
│   │   (Resource Server)    │          │  Validates token:              │  │
│   │                        │◄──────────┤   - signature                 │  │
│   │                        │  (5)      │   - issuer / audience         │  │
│   │                        │  response │   - expiry                    │  │
│   └───────────┬────────────┘          └────────────────────────────────┘  │
│               │                                                           │
│               ▼                                                           │
│      ┌──────────────────┐                                                 │
│      │ Sidecar response │                                                 │
│      │   valid?         │                                                 │
│      └───┬──────────┬───┘                                                 │
│          │          │                                                     │
│      NO  │          │  YES → returns claims (readable format)             │
│          ▼          ▼                                                     │
│   ┌────────────┐  ┌───────────────────────────────────┐                   │
│   │ Return     │  │ (6) Web API additional authz checks│                  │
│   │ 401 / 403  │  │     on claims:                     │                  │
│   │ drop call  │  │   - specific role?                 │                  │
│   └────────────┘  │   - specific group?                │                  │
│          ▲        │   - specific client (appid)?       │                  │
│          │        └───────────────┬───────────────────┘                   │
│          │                        │                                       │
│          │                checks OK?                                      │
│          │                 │          │                                   │
│          │             NO  │          │  YES                              │
│          └─────────────────┘          ▼                                   │
│                            ┌─────────────────────────────┐                │
│                            │ (7) Proceed — Web API does   │               │
│                            │     its actual work and      │               │
│                            │     returns the response     │               │
│                            └──────────────┬──────────────┘                │
│                                           │                               │
└───────────────────────────────────────────┼───────────────────────────────┘
                                            │
                                            ▼
                                    (8) Response back to Client
We can now see that the developer’s responsibility is not so high for a simple web API:
- Validate that you don’t have an empty Authorization header, except for the healthz route.
- Forward the token as quickly as possible to the sidecar.
- If you get a proper reply, you can proceed.
- And only if you need more validation, you simply have to do string validation based on the reply.
If you add to this the idea that this pattern can be used on Docker, Kubernetes, ACA/ACI/ECS without any architecture change, the added value is pretty high in my opinion.
So let’s try to generate a token from the client and see what validate should return. In the client Pwsh session, type the following (I’m using my PSMSALNet module; choose whatever solution you like to generate a token). This will open the default web browser to validate your identity. Currently, the only option we have is to authenticate as a user, not as an application (which would need a certificate, secret or a managed identity).
$ClientId = "<your client Id>"
$TenantId = "<your tenant Id>"

$token = Get-EntraToken -PublicAuthorizationCodeFlow -ClientId $ClientId -TenantId $TenantId -Resource Custom -CustomResource "api://$ClientId" -Permissions user_impersonation | % AccessToken
If you want to validate if it’s a v1 or a v2, you can type:
Start-Process "https://jwt.ms/#access_token=$token"
Check the aud claim: if it starts with api:// it’s a v1, otherwise it’s a v2. Don’t forget this is what the sidecar will validate!
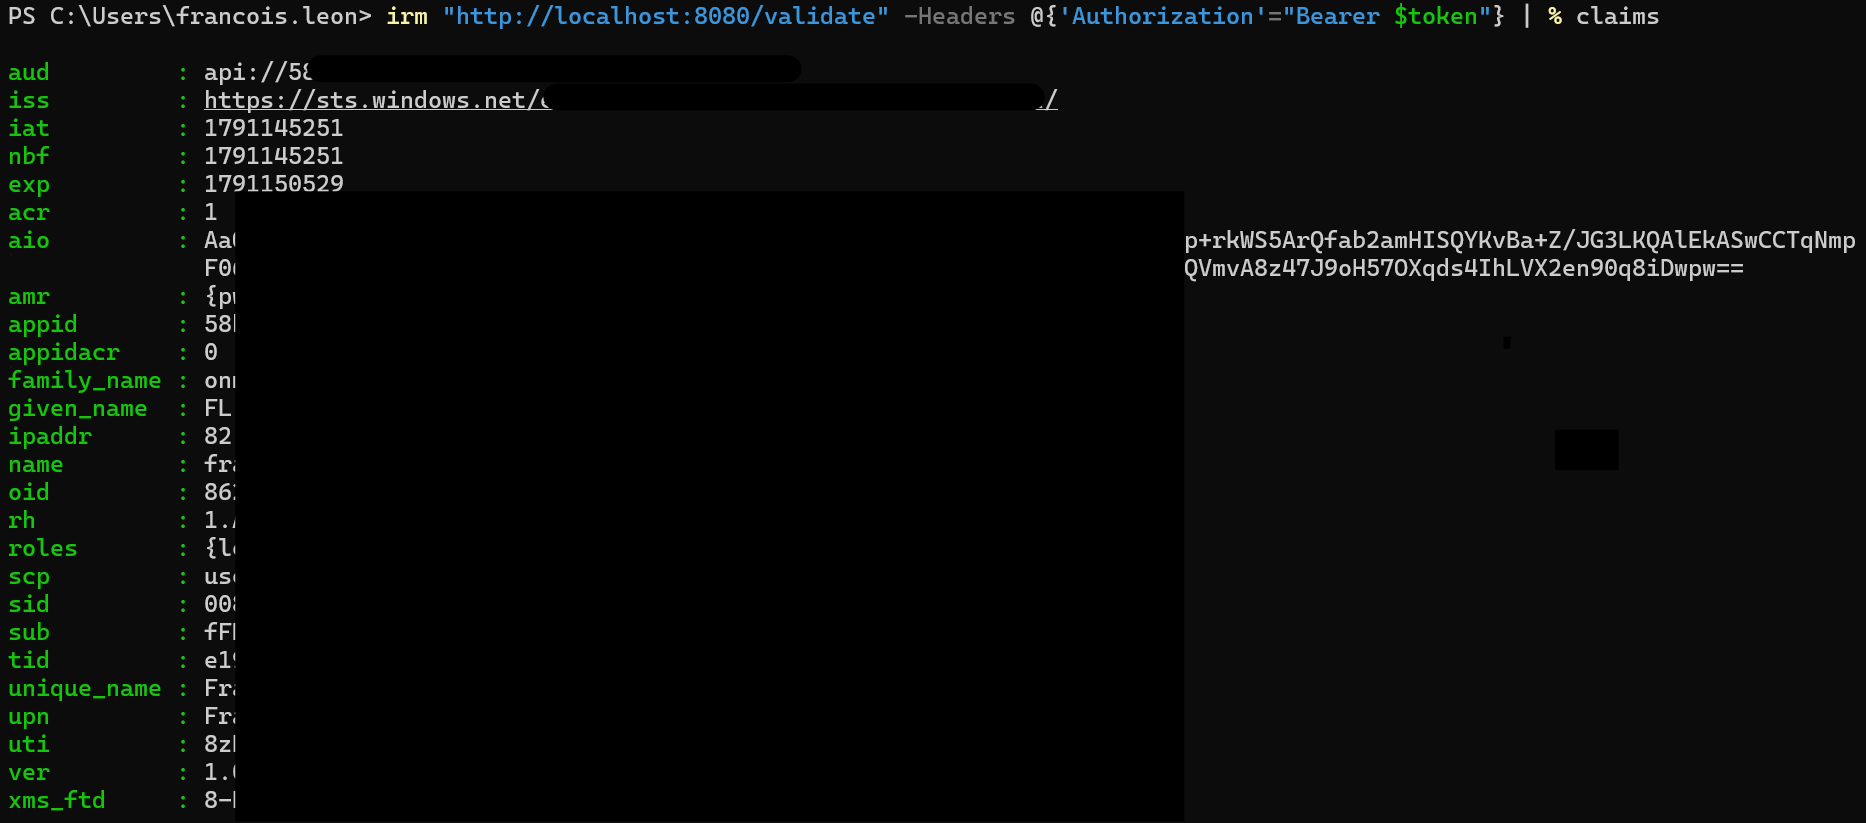
Now that we have our token, let’s call the “sidecar” (don’t forget that in the real world, it’s your API that should receive this token and forward it to the sidecar; here, for demo purposes, we take a shortcut).
irm "http://localhost:8080/validate" -Headers @{'Authorization'="Bearer $token"} | % claims
Here is the response:
Extra
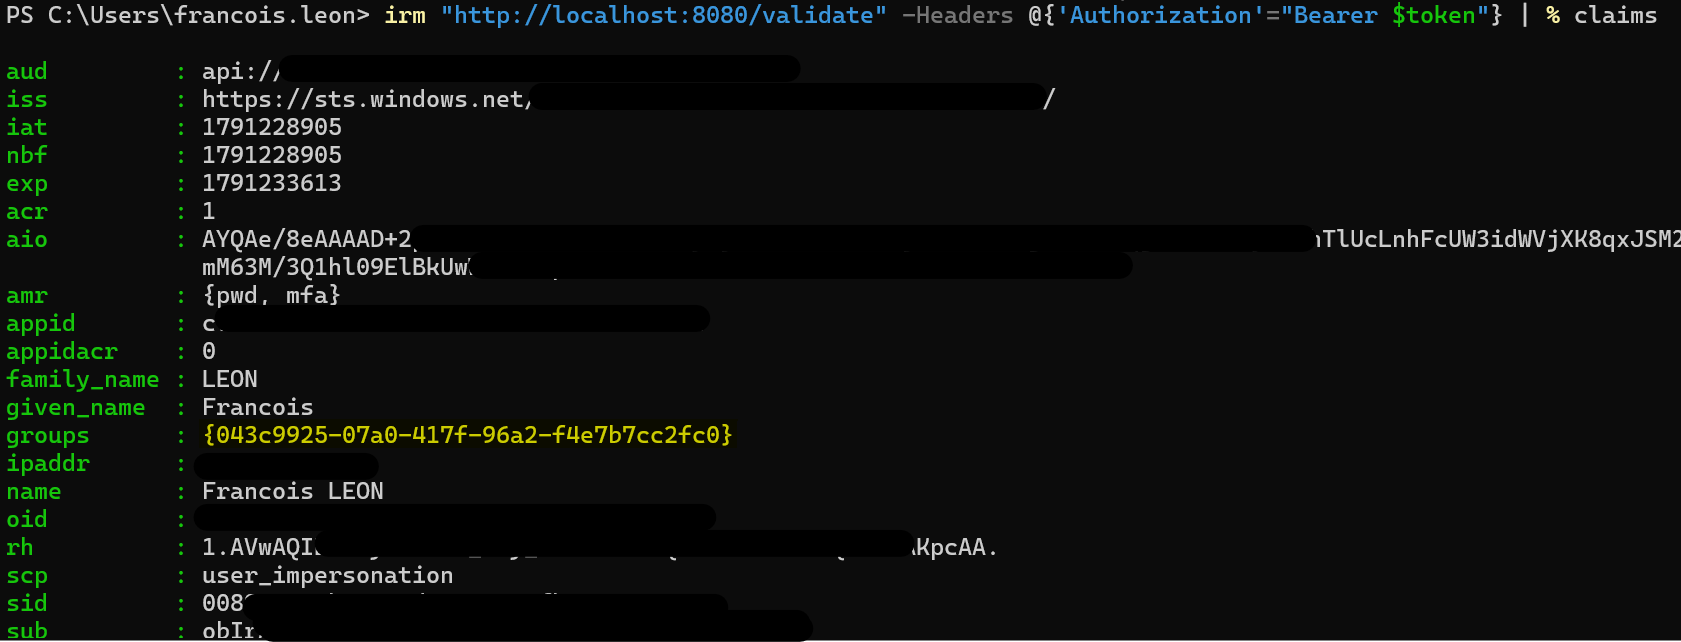
Because I wasn’t able to validate with my first tenant, I just wanted to confirm on a tenant with P1 licenses that even the groups claim can be used in the validation process. Here is the proof:
Conclusion
In this article, we’ve explained the Entra Id Auth SDK (sidecar) “feature” and we’ve started with the first step, which is the validation process (and which must be your first step as a developer). What I like with this pattern is that you don’t really care if you decide to implement your backend API in Go, Rust or any language where you don’t necessarily have a token validation library (though today there might already be one!). In the next article, we will play with both the AuthorizationHeader and DownstreamApi routes.