Introduction
In GCP, people use a service account associated with private keys to run their workflows. The problem is that you have to commit the associated private key somewhere. This is where workload identities start to shine. Long story short, it’s a way to delegate credentials validation (federation) against another identity provider and in my case, as usual it will be Azure AD. The good news is that if you have a managed identity, you can authenticate to GCP without any private keys. Guess what, I have my ARC agent!
During this article, we will cover two scenarios where we will request organization projects with REST APIs first and then with gcloud CLI. Following the 2 previous articles related to Azure ARC where I’ve talked about the storage API or the Keyvault API, this time we will use a custom one.
Configuration
AzureAD
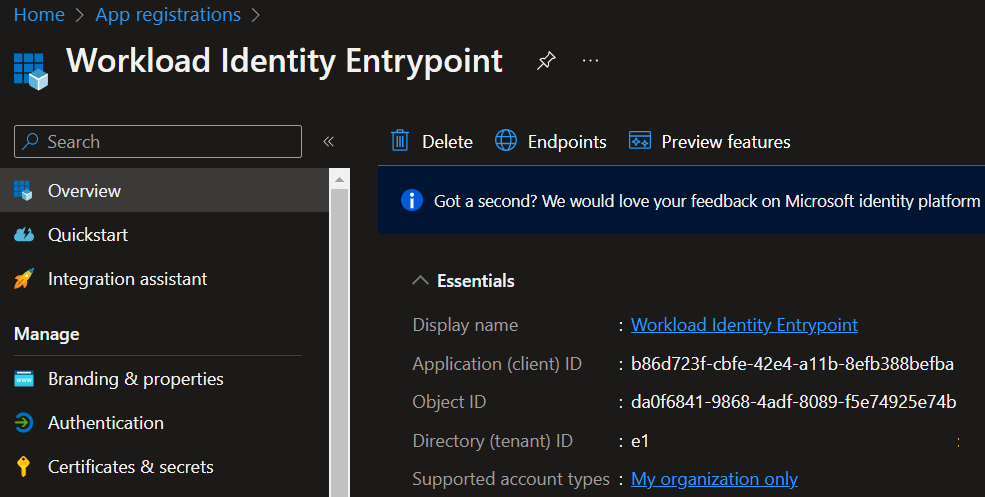
First, we have to create an app registration that will represent our workload identity pool.
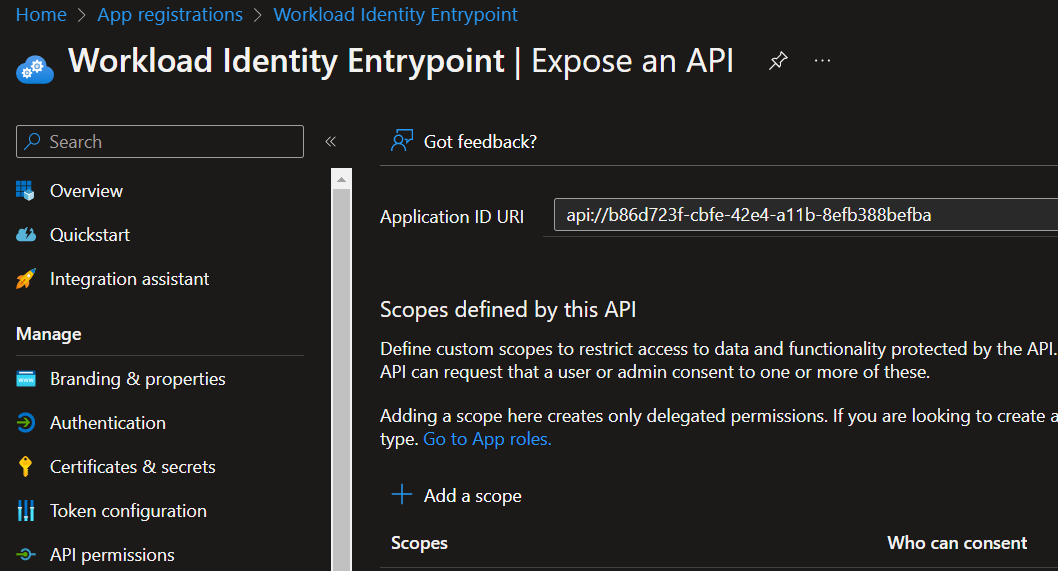
Now let’s “expose an api”:
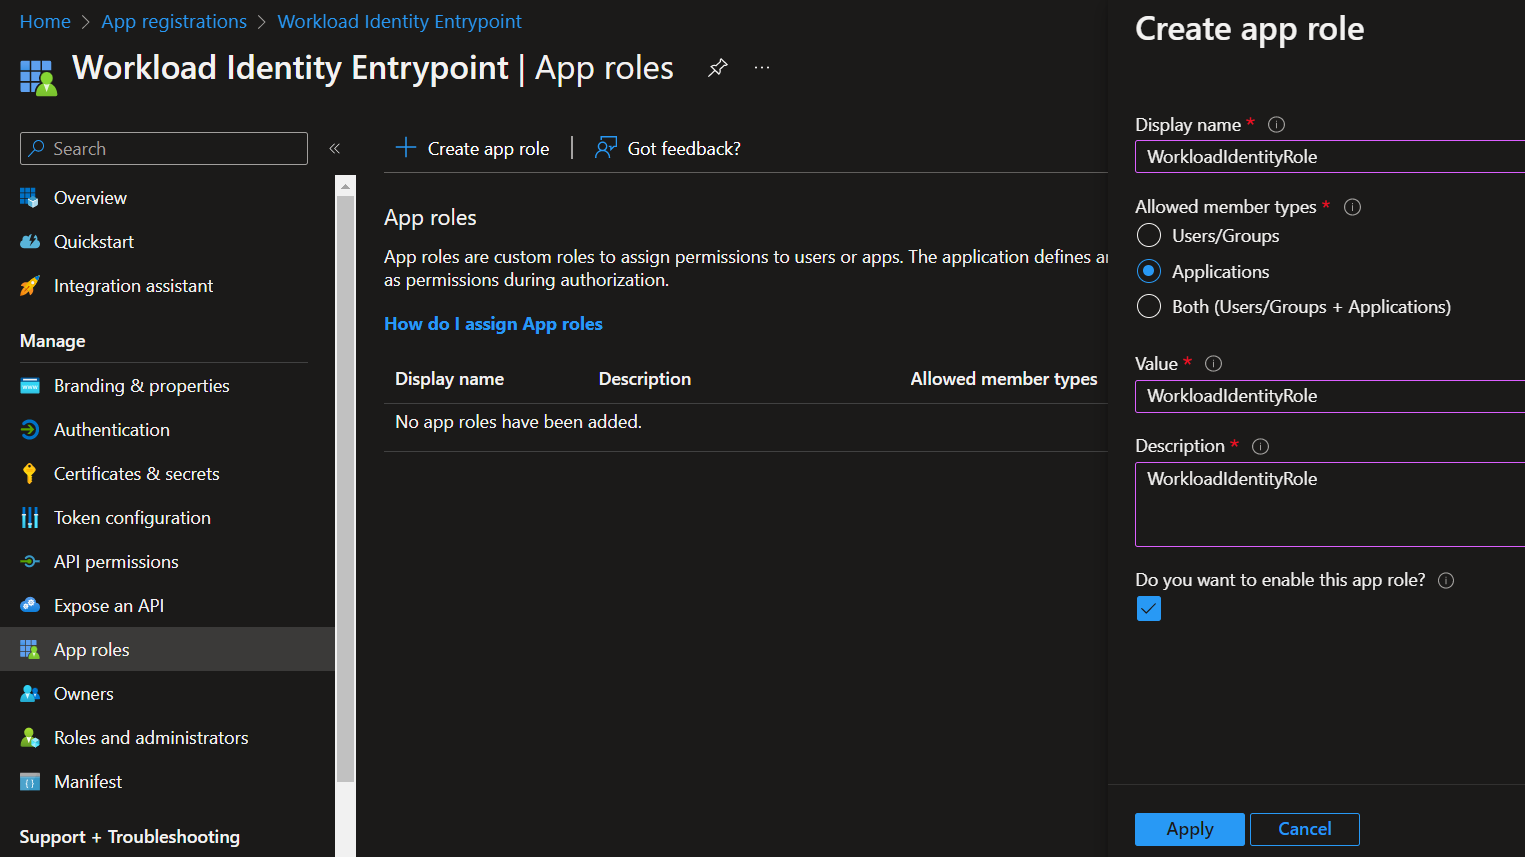
Then create a Role into the app role menu:
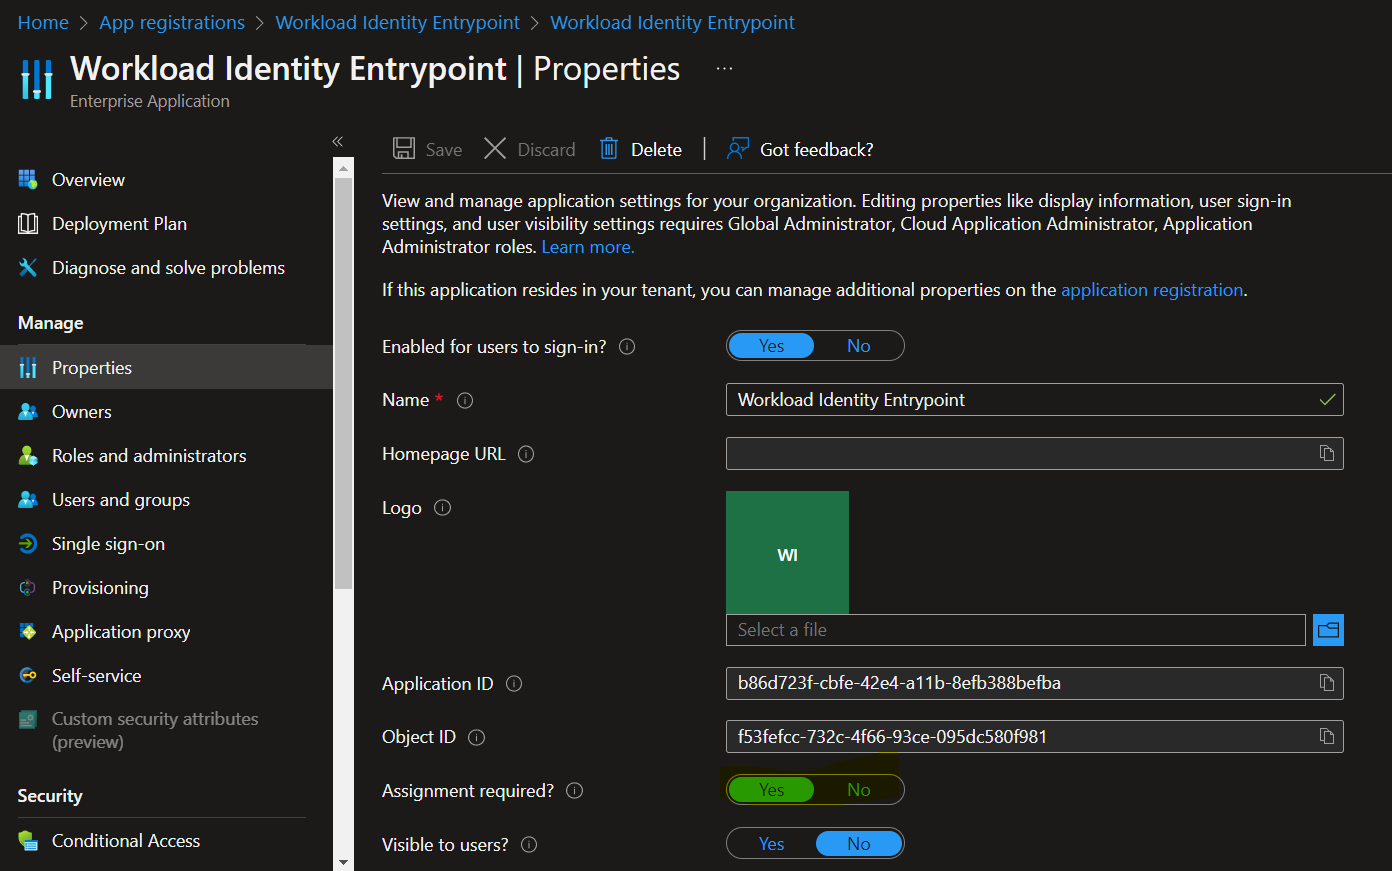
Now switch to the Enterprise app and make sure you’ve checked the assignment required:
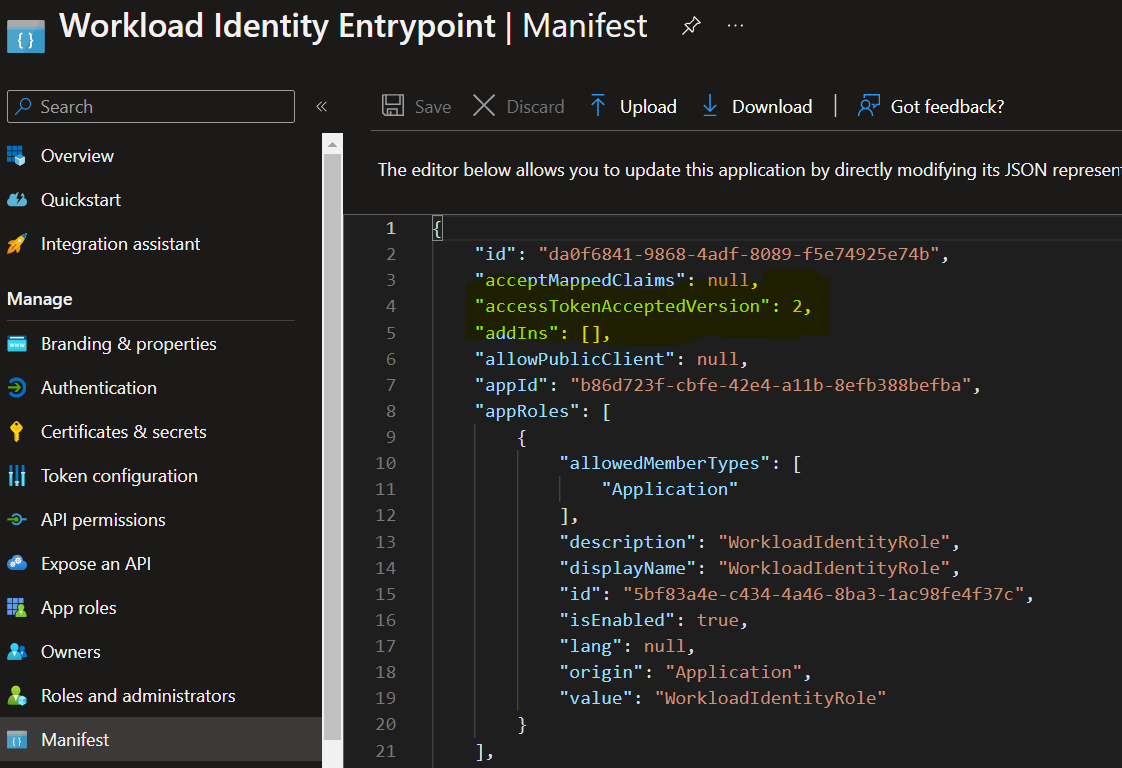
Now we know that only assigned people or application will be able to fetch an AAD token. Finally force the V2 in manifest (required for later):
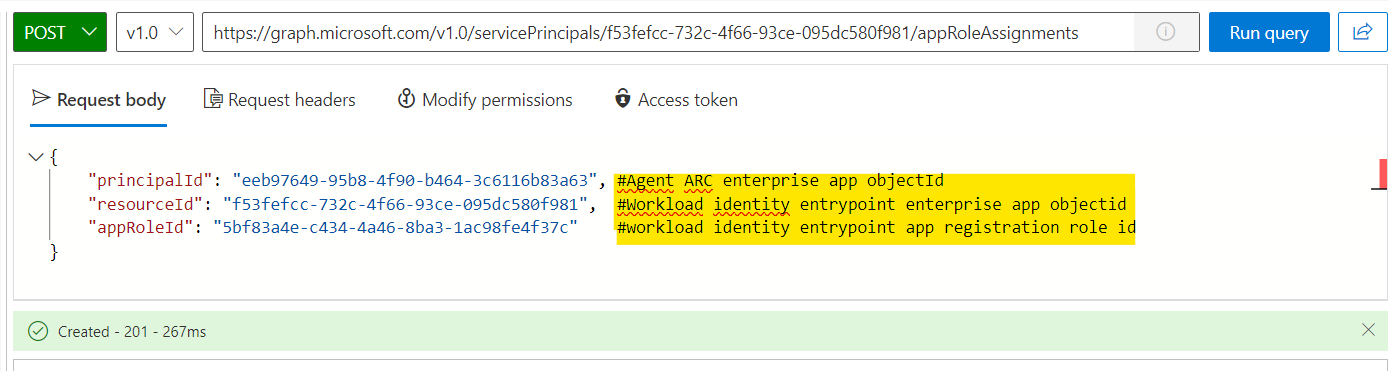
Let’s now assign your ARC agent (Same agent as previous articles) with graph api.
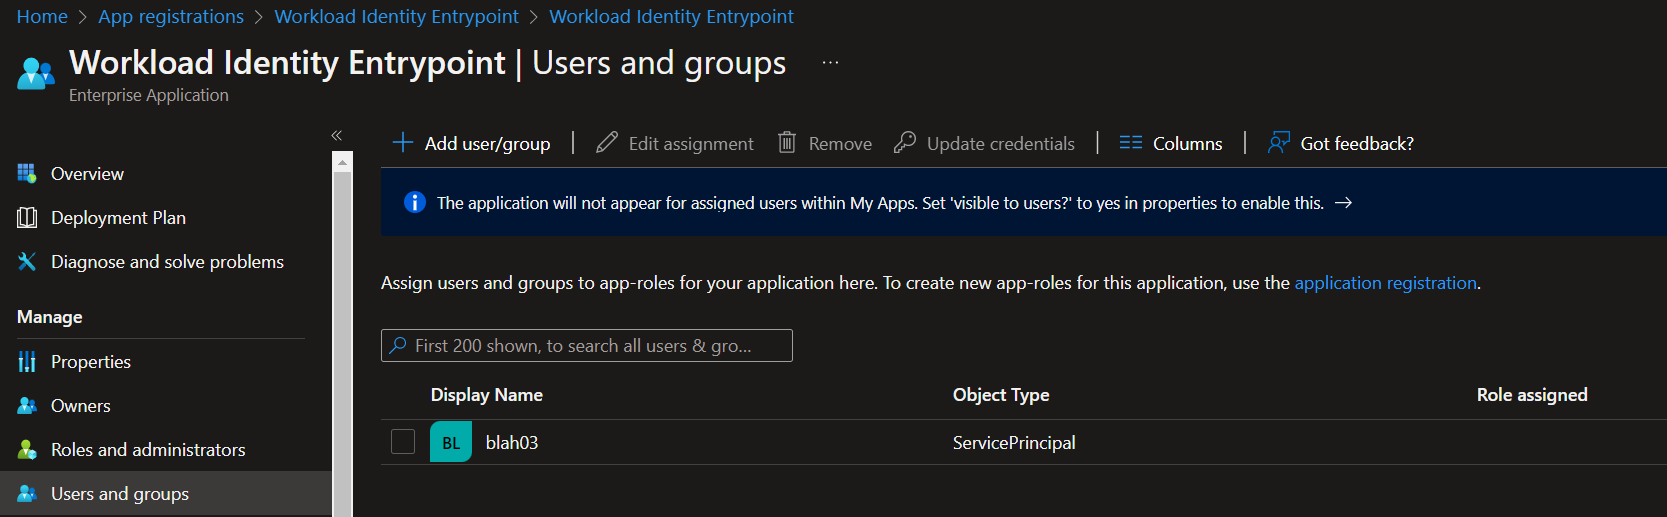
Once done, you will see your arc agent under user and group:
GCP
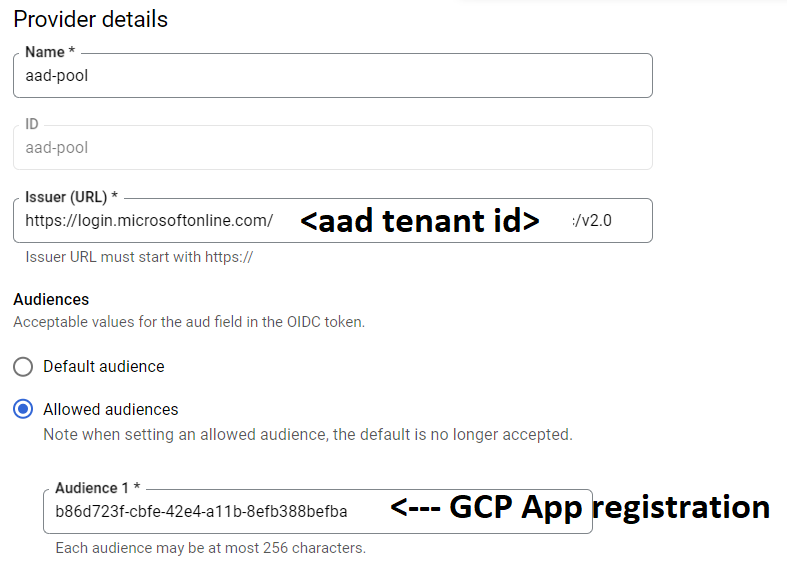
In your project, create a workload identity pool and create a new provider with few parameters like:
- A pool name
- The issuer URL with the format https://login.microsoftonline/your aadtenantid/v2.0 thanks to the tokenacceptance 2 in the manifest
- The allowed audience which is your GCP that represent your app registration.
Let’s now grant access to a service account:
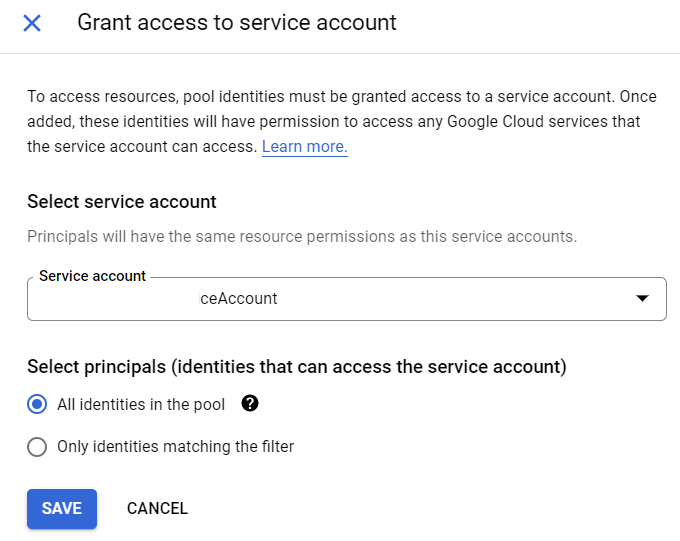
Now you have to grant proper RBAC to your service account on you rorganization/project.
And that’s it. If we summarize, on AAD side, only our ARC agent can generate a token (thanks to the assignment required) and on GCP side, we now have a service account linked to the workload identity pool with proper permission. Let’s now see in action!
Action
REST
Like the previous articles, we will need to load several functions in memory. Let’s start with the Get-AccessTokenWithAzIdentity function which will help us to generate AAD access tokens for our custom audience from any Azure compute workflows (VM, ACI, ARC, function,…). Let’s now add Get-GCPAccessTokenFromAAD Which will help us to generate GCP access tokens.
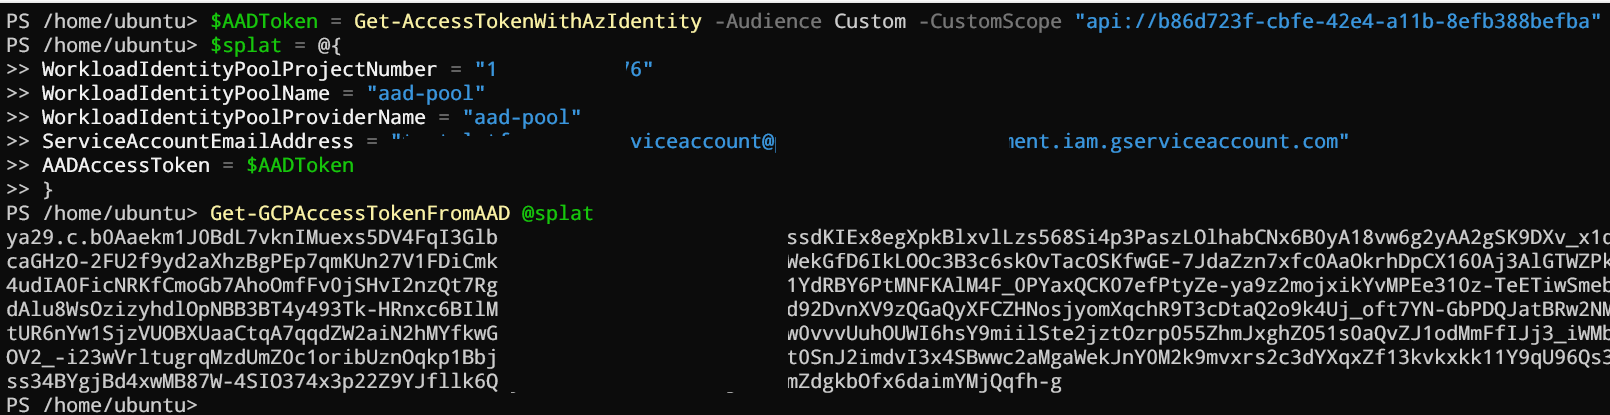
$AADToken = Get-AccessTokenWithAzIdentity -Audience Custom -CustomScope "api://<your aad app registration>"

$splat = @{
    WorkloadIdentityPoolProjectNumber = "<project number>"
    WorkloadIdentityPoolName = "<pool name>"
    WorkloadIdentityPoolProviderName = "<provider name>"
    ServiceAccountEmailAddress = "<service account>@<project ID>.iam.gserviceaccount.com"
    AADAccessToken = $AADToken
}

Get-GCPAccessTokenFromAAD @splat
Here the result:
So now what can we do with this token? This is where you have to (sadly?) use the GCP REST api reference joke eeuuhh website. I didn’t find a central way to find all APIs in the same place, every time I have to go back in the search engine type words like “project rest api reference” and cross my fingers…
In this article, we will play with the projects endpoint.
And then joke number 2, the API versioning:
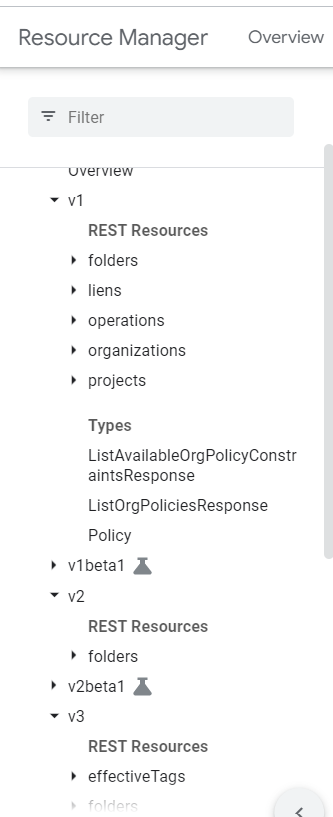
Each API has several versions where each version is unique in terms of how you interact with it and the results you will have. Anyway, I don’t want to be an asshole but come on Google, try to be in your customer shoes a little bit …
Now you know which API and version you want to use, you simply have to call the endpoint with:
$GCPToken = Get-GCPAccessTokenFromAAD @splat
irm -uri https://cloudresourcemanager.googleapis.com/v3/projects?parent=organizations%<your organization id> -Headers @{'Authorization' = "Bearer $GCPToken"} | % projects | select -f 1
Here the result:

In other words, we can now, from our AAD token, sign in as a service account and fetch Google Cloud Platform information.
Because the REST api is really a pain to use (compared to Azure), my first thought was to use the CLI and see if the result if better…
Gcloud CLI
Because the REST API is complicated, it’s legitimate to say that the CLI will be simpler … The short answer is no sadly. There is no official documentation for what we plan to do (using workload identity), or it’s well hidden.
According to the documentation, the CLI is compatible with workload identities. From the doc, it’s written that using a “configuration” cred-file should be the way to go:

But do you think there is an example of how to do this with a workload identity where the OIDC access token you send is usable only for one hour? No 😀
This is where I’ve created another function to help me in this joke. It’s now time to load another function in memory called New-GCPWorkloadIdentityTemplate. This function will require the AAD token and will create 2 files (yes in fact, it’s two, not one …). One dedicated file for the whole configuration like before (Project number, WI pool, …) and another with the generated AAD accesstoken.
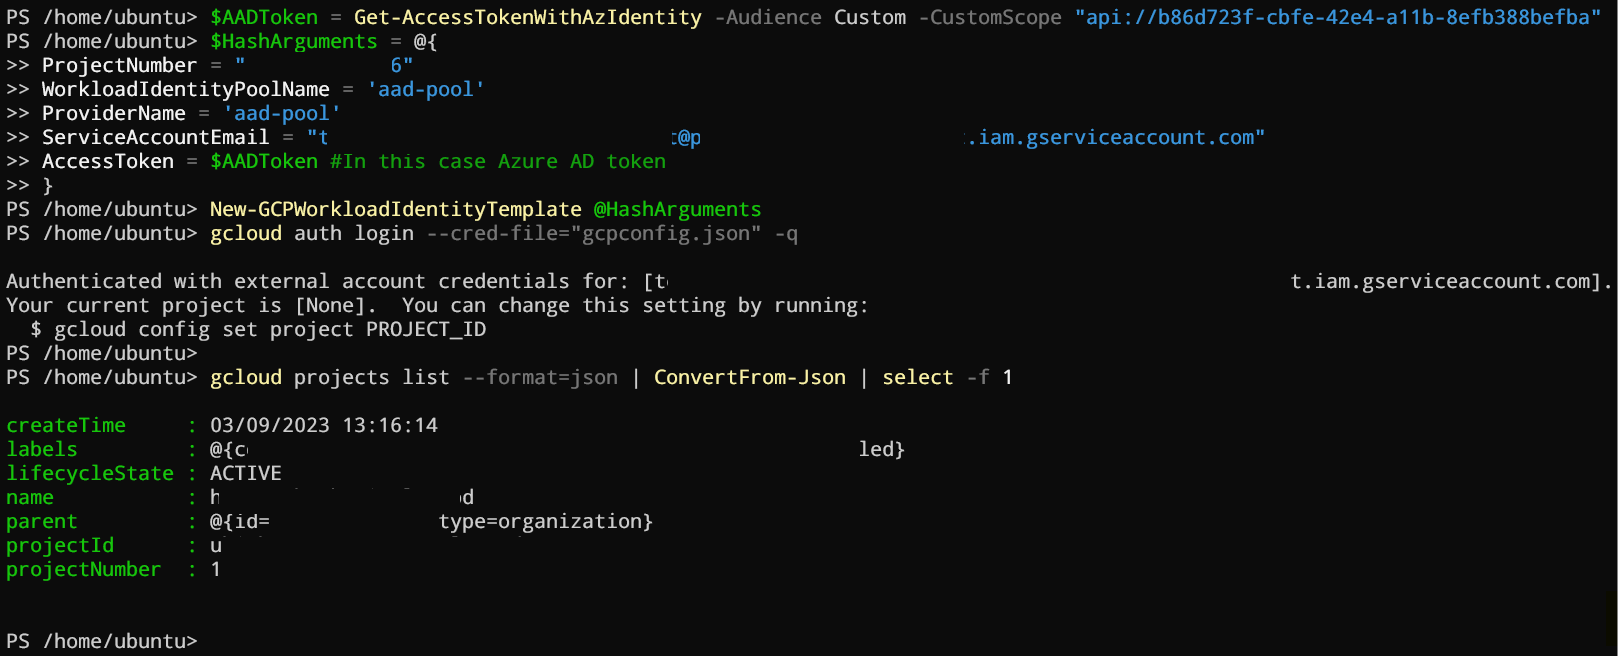
$AADToken = Get-AccessTokenWithAzIdentity -Audience Custom -CustomScope "api://b86d723f-cbfe-42e4-a11b-8efb388befba"

$HashArguments = @{
    ProjectNumber = "<project number>"
    WorkloadIdentityPoolName = 'aad-pool'
    ProviderName = 'aad-pool'
    ServiceAccountEmail = "<service account>@<project id>.iam.gserviceaccount.com"
    AccessToken = $AADToken
}

New-GCPWorkloadIdentityTemplate @HashArguments
gcloud auth login --cred-file="gcpconfig.json" -q #q ) quiet
gcloud projects list --format=json | ConvertFrom-Json | select -f 1
Here the result:
Conclusion
In summary, I had to find a way to work with GCP in a secure way but in my opinion, this platform requires a lot of work from the provider to really compete with the 2 others. In addition, what I’ve done with GCP, you can do it with AWS as well if you plan to use the assume role with web identity. Don’t hesitate to ask if it’s something you like to read. See you in the next one.